5.10.1. Record
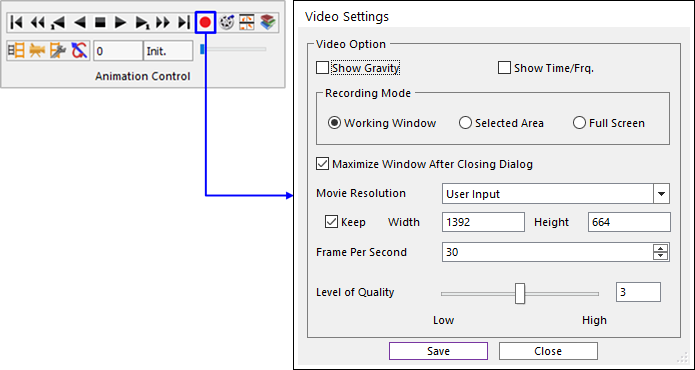
Figure 5.86 Video Settings dialog box
Show Gravity: If this option is checked, the gravity icon is displayed in the *.mp4 file.
Show Time/Frq.: If this option is checked, the animation time or the frequency is displayed in the *.mp4 file.
Recording Mode: Three recording modes are supported. The method is different as shown following. Work Window mode is recorded even if it is hidden. but Select Area/Full screen mode is not recorded if it is hidden by the screen capture method.
Working Window: The working window area is recorded.
Select Area: Supports the function to select an area by dragging or clicking, and only the selected area is recorded.
Full Screen: The monitor screen where the RecurDyn is located is recorded.
Maximize Window After Closing Dialog: If this option is checked, the Working Window is maximized after closing the Video Settings dialog box.
Movie Resolution: Selects the movie resolution among 320x240, 640x480, 800x600, 1024x768, 1152x864, 1280x960, 1280x1024, and 1920x1080. If User Input is selected, the user can enter the resolution.
Keep: If this option is checked, the resolution aspect ratio is maintained.
Width: If you select User Input option in Movie Resolution, this input box is activated. This value determines the horizontal resolution of the video.
Height: If you select User Input option in Movie Resolution, this input box is activated. This value determines the vertical resolution of the video.
Frame Per Second: Defines the number of frames per second.
Level of Quality: This uses fixed quality-based Variable-Bit-Rate encoding.
The main advantage of quality-based VBR encoding is that quality is consistent within a file and from one file to the next.
Level of Quality enables you to specify a level of quality for a video stream instead of a bit rate. The codec will then encode the content so that all samples are of comparable quality.
You can select a video quality level with slider (or type on textbox), where value is a number from 1-5, with 5 being highest quality/largest file size and 1 being the lowest quality/smallest file size.
The video quality can be affected if the file size is further lowered by lowering the “Level of Quality” value under 3.
Save: Saves the information of the animation to an *.mp4 file on the desired disk drive.
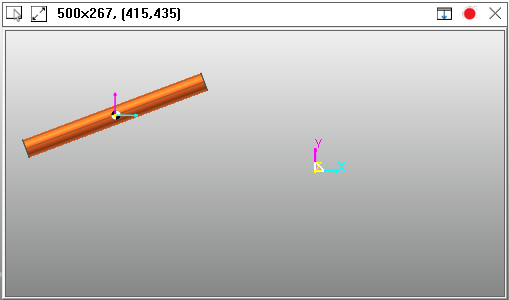
Figure 5.87 Select Area dialog box
Select Operation: The red area created by hovering or dragging the mouse is set as the recording area.
Full Screen/Select Area: Change to Full Screen mode or Change to Select Area Mode.
Hide/Show Video Settings: Hide or Show the video settings dialog.
Record Start/Stop: Support use the save function of video settings dialog.
Close: Hide Select Area dialog.

Figure 5.88 Full Screen dialog box
Pin/Unpin: If the state is Unpin state, Full Screen Dialog will be automatically hidden after a certain amount of time.
Full Screen/Select Area: Change to Full Screen mode or Change to Select Area Mode.
Hide/Show Video Settings: Hide or Show the video settings dialog.
Record Start/Stop: Support use the save function of video settings dialog.
Close: Hide Select Area dialog.