20.1. CoLink in RecurDyn

Figure 20.1 CoLink and CoLink Settings group in the Communicator tab
20.1.1. General GPlant Inputs
The user can set variables that define actuator forces from control system design tools.
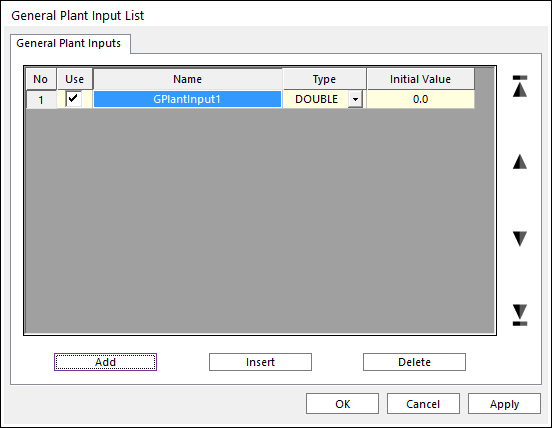
Figure 20.2 GPlant Input List dialog box
Use: Determines whether or not to use.
Name: Defines a name.
Type: Define data type, only support Double type until now.
Add: Adds a row to the end of the table.
Insert: Inserts a row where the cursor is and move the current and later rows down.
Delete: Deletes the row where the cursor is and move the later rows up.
Step to create a GPlant Input
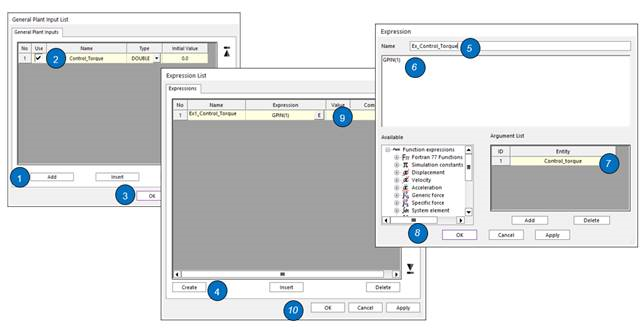
Figure 20.3 Usage of a GPlant Input
Click Add in the GPlant Input List dialog box.
Rename a GPlant Input.
Click OK in the GPlant Input List dialog box.
Open the Expression List dialog box. And click Create.
Define an expression name.
Edit the value to GPIN (ID)
Input the GPlant Input in the Argument List.
Click OK in the Expression dialog box.
Select the expression entity to use the GPlant Input.
Click OK in the Expression List dialog box.
20.1.2. General GPlant Outputs
The user can set variables that define monitoring states outputted from RecurDyn.
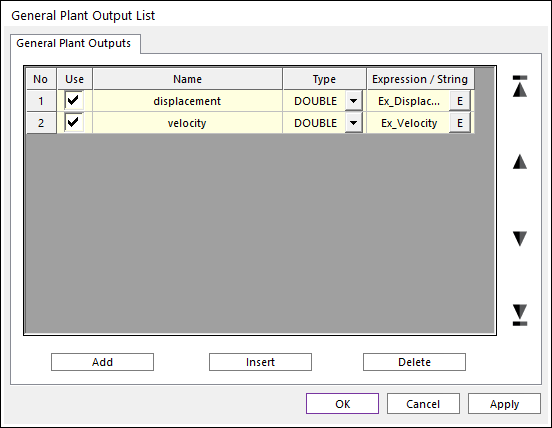
Figure 20.4 GPlant Output List dialog box
Use: Determines whether or not to use.
Name: Defines a name.
Expression: Defines an expression function.
Add: Adds a row to the end of the table.
Insert: Inserts a row where the cursor is and move the current and later rows down.
Delete: Deletes the row where the cursor is and move the later rows up.
Step to create a GPlant Output
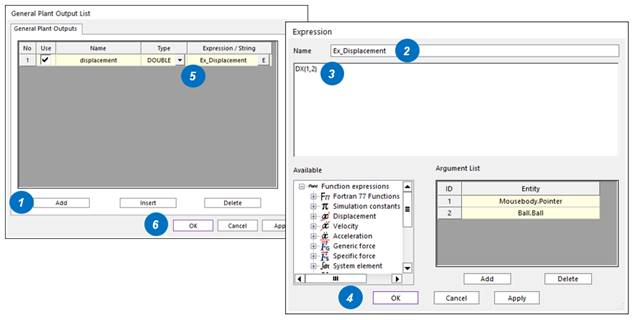
Figure 20.5 Usage of a GPlant Output
Click Add in the GPlant Output List dialog box.
Define an expression name.
Define an expression function to get the value the user wants.
Click OK in the Expression dialog box.
Select the expression entity to use the GPlant Output.
Click OK in the GPlant Output List dialog box.
20.1.3. RecurDyn Interface

Figure 20.6 RecurDyn Interface dialog box
Plant Input (CoLink -> RecurDyn): Allows to access the GPlant Input List dialog box.
Plant Output (RecurDyn -> CoLink): Allows to access the GPlant Output List dialog box.
Update All available Plant Inputs and Outputs: By clicking the button, All available Plant Inputs and Outputs are added.
20.1.4. Run
The user can start or close the CoLink program by the Run icon.
20.1.5. Show/Hide
The user can know the program state whether to show or hide the CoLink program by the Show/Hide icon.
If the Show/Hide icon is inactivated, the CoLink program is off.
If the Show/Hide icon is activated and highlighted, the CoLink program is on and it is displayed.
If the Show/Hide icon is activated and is not highlighted, the CoLink program is on. But it is hided.
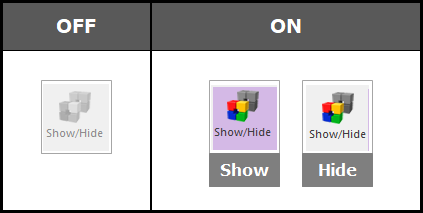
Figure 20.7 State of Show/Hide icon
20.1.6. Connect CoLink
The user can connect CoLink with RecurDyn by the ConnectCoLink icon.
20.1.7. Open with This Model when Running CoLink
The user can also open the specific model when it is run with the CoLink Setting Group setting. All CoLink files in the same location or subfolder are listed up in the combo box list.