44.6.1. How to Use Plot Automation
44.6.1.1. Step I (Create a Template File for Plot Automation)
The user has to set up the template file to be recognized in eTemplate. In this template file, essential components are Template_Format sheet and Template_Data sheet (or Master sheet).
Create Template_Format sheet
The user can define the process feature in this sheet.
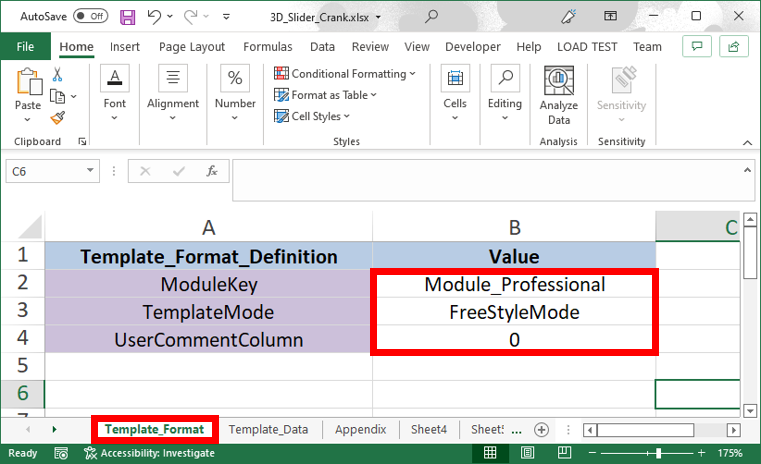
Modulekey: Select a RecurDyn product module.
TemplateMode: Select a parameter arrangement method.
UserCommentColumn: Enter a value between 1 and 5 to use one of the columns between A and E in the sheet. If the user does not want to use a column, enter 0.
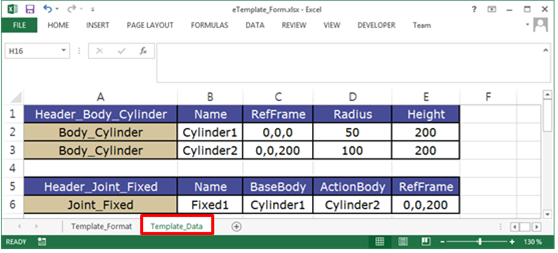
Create Template_Data sheet
The user can define the modeling data.
Define Master Sheet (Optional)
The user can control the modeling data in the several sheet by using Master sheet instead of Template_Data sheet.
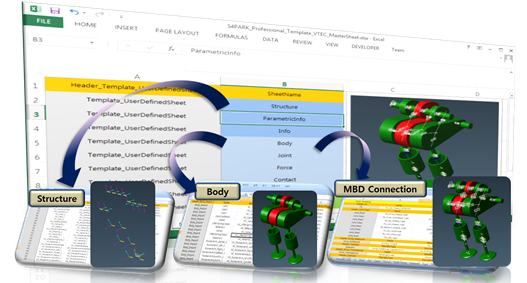
Change the name of Template_Data sheet to Master.
Define names of sub-sheets in Master sheet.

Create sheets and then change names of the sheets to defined names in Master sheet.
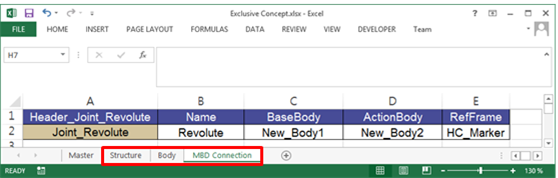
Configure the modeling data in user-defined sheets.
44.6.1.2. Step II (Define Plot Automation Parameters)
For drawing the plot curve, the user must configure the Header and Parameter and enter the values in the template.
Define Header and Parameter for Plot Automation
Define RPLT to import. If the user want to use the current simulation result, this process can be skipped.

Define curve data to draw.

Define drawing process. The user have to enter the above defined curve data and enter the page and pane you want to draw in.

Tip
Dragging and dropping the XData and YData input data
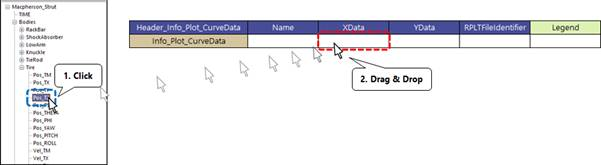
Drag and drop the relevant data from Plot Database to the input field in the Excel sheet to copy the data path
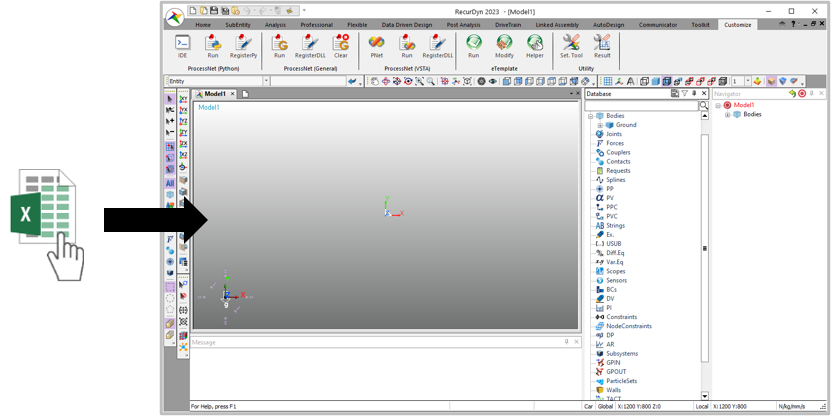
44.6.1.3. Step III (Run eTemplate)
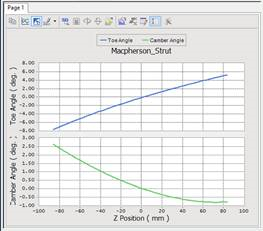
The target curve data can be drawn by running the template in RecurDyn.
Run eTemplate
Execute RecurDyn program.
Create a new RecurDyn Model.
Click Run icon of the eTemplate group in the Costomize tab.

Open the template file that made in step II. Then the plot curve data is drawn automatically.
Run eTemplate using Drag & Drop
The user can drag and drop template file in to RecurDyn to run eTemplate.