18.2.1.3. Target
Target should be set to simulate.
There are two tabs in Target Output List dialog.
Target Output List tab: Set Target Signal by choosing a “*.TARGET” file.
Target Output Function tab: Making “*.TARGET” file from a signal file “*.CSV”.
Step to set Target
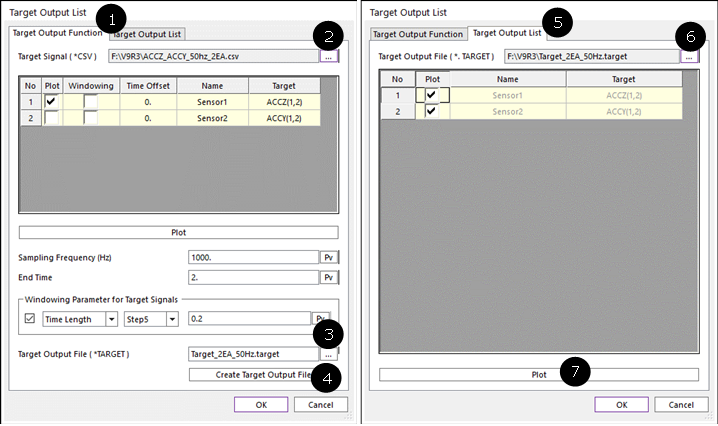
Figure 18.9 Example to set a target
Move to Target Output Function tab in Target Output List dialog.
Select a “*.CSV” file which has the target sensor signal(s).
Set target output “*.TARGET” file name and path.
Click Create Target Output File.
Move to Target Output List tab in Target Output List dialog box.
Check loading the “*.TARGET” file or select another “*.TARGET” file.
Target Output List
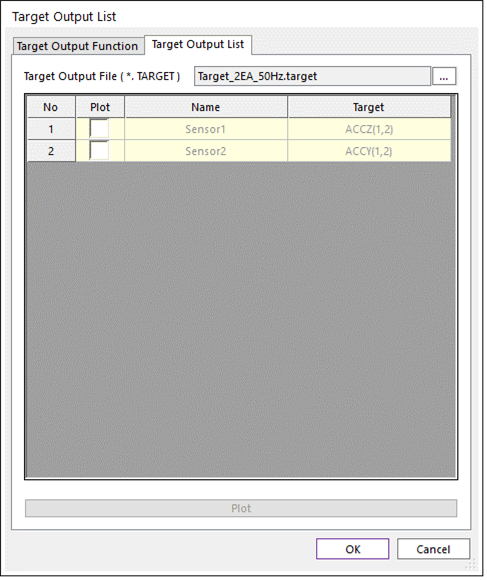
Figure 18.10 Target Output List dialog box [Target Output List tab]
The list cannot be modified. The list is always the same with created Sensor list. Because, the Target channels should be the same with the created Sensor channels.
Target Output File (*.TARGET) : *.TARGET file can be set by clicking ….
Plot: If a *.TARGET file is set and some plot check box in the list are checked, then the user can see the Target signal of choosing Sensor channel by clicking Plot.
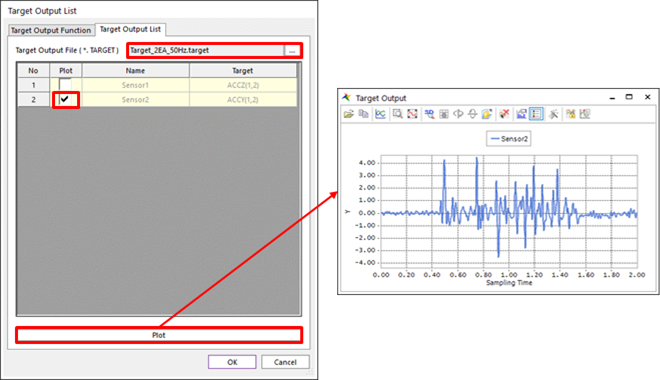
Figure 18.11 Plot example of Target Output List tab
Target Output Function
The list cannot be modified. The list is always the same with created Sensor list. Because, the Target channels should be the same with the created Sensor channels.
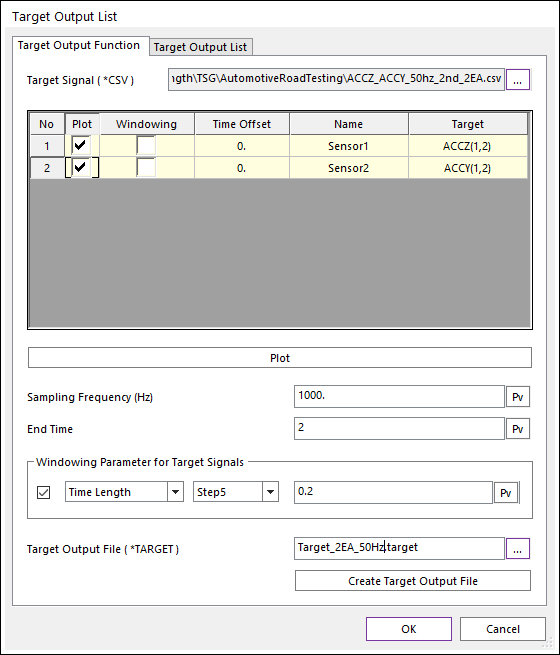
Figure 18.12 Target Output List dialog box [Target Output Function tab]
Target Signal (*.CSV): “*.CSV” file should be needed. All data of “*.CSV” should be CSV (Comma-Separated Values). And there’s no needed header strings on first line. The number of columns should be 2 times of the number of sensors. Because every odd column should be a time data.
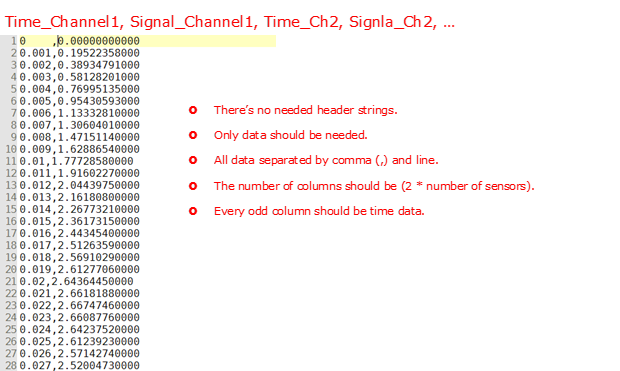
Figure 18.13 CSV file format for Target Signal
Plot: User can choose plot view or not.
Windowing: If this checkbox is checked, then the generated target signal is considered the windowing function. Default is unchecked.
Time offset: If this value is set, then the time data of the CSV Signal is considered as (Time_CSV-Time_Offset). Default value is 0.
Plot: If a “*.CSV” is set and some plot check box are checked, then user can see the signal data on the opened scope dialog.
Sampling Frequency (Hz): Sampling Frequency (Hz) should be set.
End Time (s): End Time (s) should be set. The number of target signal data should be (Sampling_Frequency * End_Time + 1).
Windowing Parameter for Target Signals: If the check box is selected, then a windowing function is considered. Linear trapezoidal function is always computed.
Data Size: A natural value greater than 0 should be set. And the Data Size should be lower than the number of signal data.
Linear/Step5: Two interpolation function types are available for windowing function. Default is Step5 function.
Time Length (s): A real number greater than 0.0 should be set.
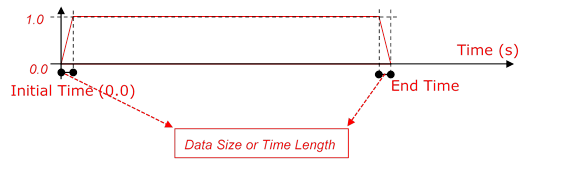
Figure 18.14 Windowing function for generating “*.TARGET” file
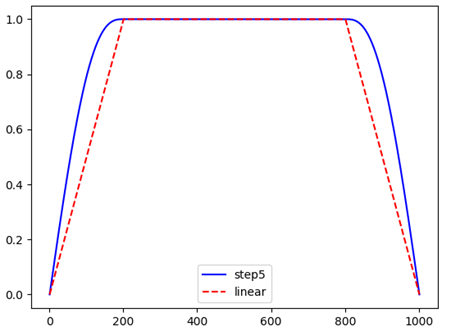
Figure 18.15 Comparison of the interpolation types for Windowing function
Target Output File (*.TARGET): Defines a file name and path by clicking ….
Create Target Output File: Generates the *.TARGET file by clicking this button.