2.2.9.3. Advanced Object Control
This tool supports specific functions to move some entities. If using with much more understanding, it is very useful for advanced users.
2.2.9.3.1. Translate
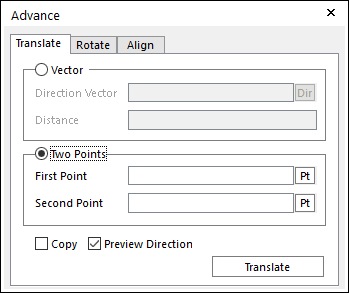
Figure 2.96 Advance dialog box [Translate]
Vector: If this option is checked, you can specify a direction and distance to the selected object.
Direction Vector: Specifies a direction to the selected object.
Distance: Specifies a distance to the selected object.
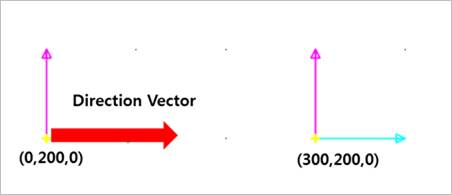
Figure 2.97 Direction Vector and Distance
Two Points: If this option is checked, you can specify two points to decide a direction and distance relative to the selected object.
First Point: Specifies the first point.
Second Point: Specifies the second point.
Copy: Copies a selected object.
Preview Direction: Previews the direction to move the selected object.
Translate: Applies the translate function to the selected object.
Step to Translate an Entity
Click the Advanced Object Control icon in the Advanced Toolbar.
Select the Translate tab in the Advance dialog box.
Select a type between Vector and Two Points.
In case of Vector,
Specify Direction Vector and Distance.
If desired, select Copy to translate a copy of selected object or objects.
If desired, select Preview Direction to preview the direction vector.
Select an entity for Object Control.
Click Translate.
In case of Two Points,
Specify First Point and Second Point.
If desired, select Copy to translate a copy of selected object or objects.
If desired, select Preview Direction to preview the direction vector.
Select an entity for Object Control.
Click Translate.
2.2.9.3.2. Rotate
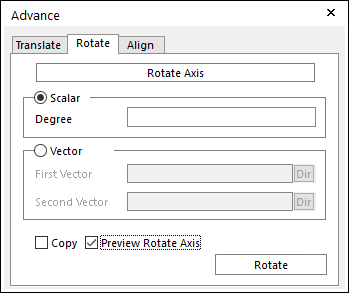
Figure 2.98 Advance dialog box [Rotate]
Rotate Axis: Specifies a rotate axis for the selected object.
Scalar: If this option is checked, you can specify an angle to rotate the selected object.
Degree: Specifies a value of angle to rotate the selected object.
Vector: If this option is checked, you can specify the first vector and second vector to decide an angle to rotate the selected object.
First Vector: Specifies the first vector.
Second Vector: Specifies the second vector.
Copy: Copies a selected object.
Preview Rotate Axis: Previews a rotate axis to the selected object.
Rotate: Applies the rotate function to the selected object.
Step to Rotate an Entity
Click the Advanced Object Control icon in the Advanced Toolbar.
Select the Rotate tab in the Advance dialog box.
Specify Rotate Axis by clicking from window using the Rotate Axis button.
Select a type between Scalar and Vector.
In case of Scalar,
Specify an angle.
If desired, select Copy to rotate a copy of selected object or objects.
If desired, select Preview Direction to preview the direction vector.
Select an entity for Object Control.
Click Rotate.
In case of Vector,
Specify First Vector and Second Vector.
If desired, select Copy to rotate a copy of selected object or objects.
If desired, select Preview Direction to preview the direction vector.
Select an entity for Object Control.
Click Rotate.
2.2.9.3.3. Align
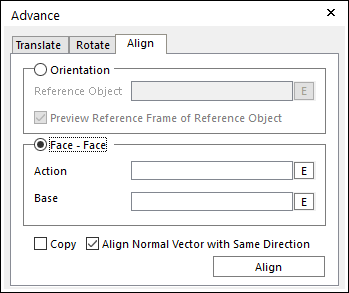
Figure 2.99 Advance dialog box [Align]
Orientation: If this option is checked, you can align a set of selected entities to the orientation of reference object.
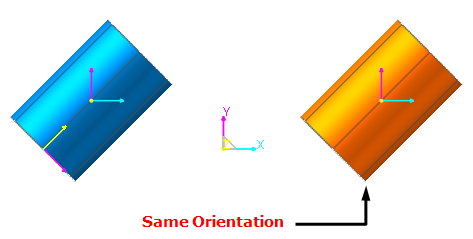
Figure 2.100 Align the target entity
Reference Object: Specify the reference object.
Preview Reference Frame of Reference Object: Previews the reference frame of specified reference object.
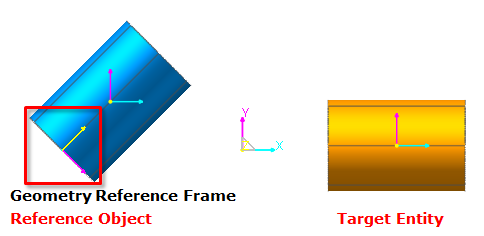
Figure 2.101 Preview the geometry reference frame
Face-Face: If this option is checked, you can specify the action and base face.
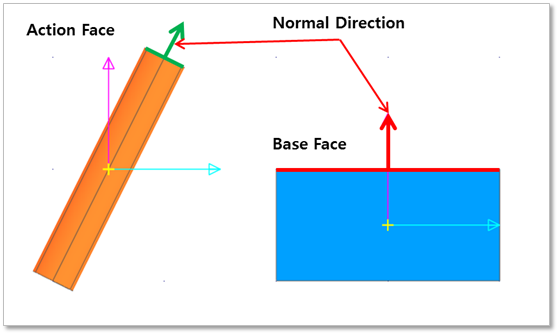
Figure 2.102 Action Face & Base Face
Action: Specify the action face.
Base: Specify the base face.
Copy: Copies a selected object.
Align Normal Vector with Same Direction: Aligns the normal vectors of action and base face.
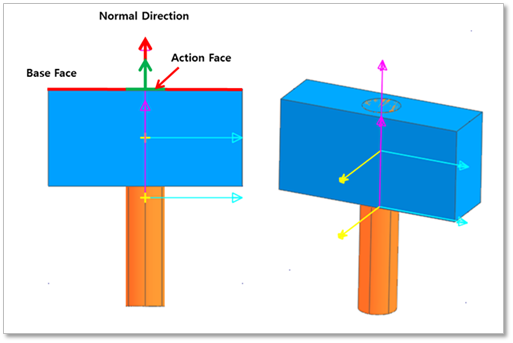
Figure 2.103 After using the Align Normal Vector with Same Direction option
Align: Applies the align function to the selected object.
Step to Align Entities
Click the Advanced Object Control icon in the Advanced Toolbar.
Select the Align tab in the Advance dialog box.
Select a type between Orientation and Face-Face.
In case of Orientation,
Specify Reference Object.
If desired, select Preview Reference Frame of Reference Object to preview the geometry reference frame of the selected entity.
Click Align.
In case of Face – Face,
Specify the action face and base face.
If desired, select Align Normal Vector with Same Direction to align normal vector of action and base face.
Click Align.