2.2.2.6. Help
The user can open help manual and help page, utility folder.
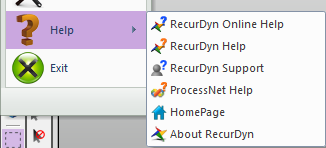
Figure 2.34 Help menu
RecurDyn Online Help: Open a RecurDyn Online Help manual.
RecurDyn Help: Open a RecurDyn Help manual. It is not needed to be connected to the network.
RecurDyn Support: Open a RecurDyn Support page.
ProcessNet Help: Open a local ProcessNet Help manual. It is not needed to be connected to the network.
HomePage: Open a FunctionBay Homepage.
Utility Folder: Open a utility folder. (<Install Dir>\Bin\Utility)
About RecurDyn: Open an About RecurDyn dialog.
2.2.2.6.1. Utility Folder
RecurDyn supports some useful utility tools. These tools are in <Install Dir>\Bin\Utility folder.
BatchCommandManager.exe
The user can easily generate batch commands and create a batch file. And the user can run commands without creating batch file in dialog. For more information, click here.
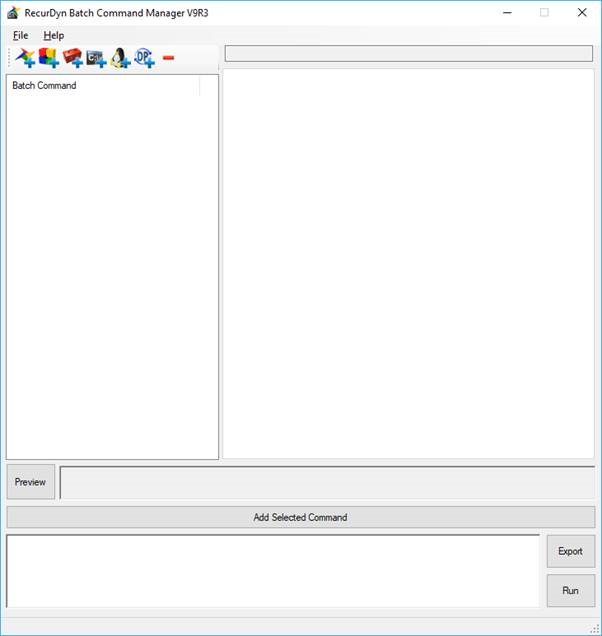
Figure 2.35 RecurDyn Batch Command Manager dialog
LicenseInfo.exe
The user can check license state.
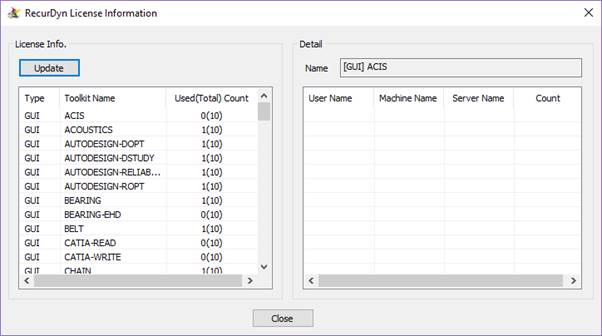
Figure 2.36 RecurDyn License Information dialog
RegenerateResultFiles.exe
The user can merge or extract animation and plot results. This function can be executed by clicking on the Result icon in the Customize tab without opening the Utility folder.
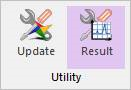
Figure 2.37 Result icon in the Utility group of the Customize tab
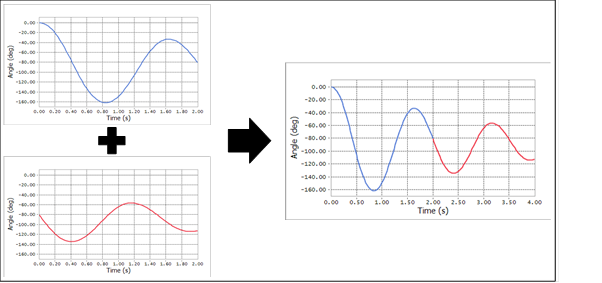
Figure 2.38 Merge plot result file(*.rplt)
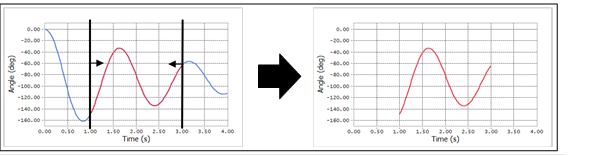
Figure 2.39 Extract plot result file(*.rplt)
Merge Result Files
The user can merge result files created by using *.icf with previous results for an animation and plot.
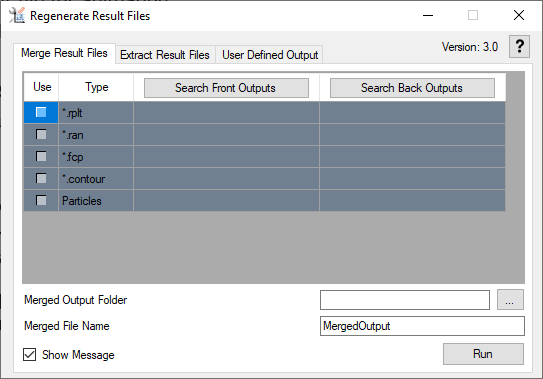
Figure 2.40 Merge Result Files tab in Regenerate Result Files dialog
Search Front Outputs: Set the front output files to be used for merge. If you select the *.rplt or *.ran file, the related result files can be loaded.
Search Back Outputs: Set the back output files to be used for merge. If you select the *.rplt or *.ran file, the related result files can be loaded.
Use: Select whether to merge or not for each file.
*.rplt: Result file for plot.
*.ran: Result file for animation.
*.fcp: Result file for contact pressure animation of flexible bodies.
*.contour: Result file for contour animation of rigid bodies.
Particles: Result files for particle animation(*.rpa, *.rwa, *.bin).
Merged Output Folder: Set the location to create the merged result files.
Merged File Name: Set the name to be created.
Show Message: Select whether to show message dialog.
Run: Run the merge. Files that have been merged are displayed in green, and files that have been failed are displayed in red.
To merge result files as batch file
The user can merge animation and plot results using batch file.[RegenerateResultFiles.exe] /merge [front output folder] [front file name] [back output folder] [back file name] [merged output folder] [merged file name]Example)<Install Dir>\Bin\Utility\RegenerateResultFiles.exe” /merge “C:\Model1_01” Model1 “C:\Model1_02” Model1 “C:\Merged” MergedResult
Extract Result Files
The user can extract animation and plot results for specific time.
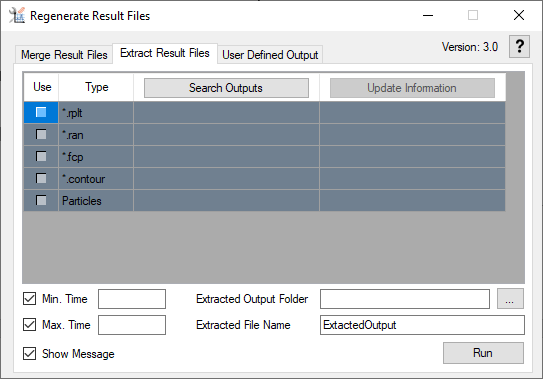
Figure 2.41 Extract Result Files tab in Regenerate Result Files dialog
Search Outputs: Set the output files to be used for extract. If you select the *.rplt or *.ran file, the related result files can be loaded.
Update Information: Read the time or step information about the file. It is an additional task and you can skip it.
Use: Select whether to extract or not for each file.
*.rplt: Result file for plot.
*.ran: Result file for animation.
*.fcp: Result file for contact pressure animation of flexible bodies.
*.contour: Result file for contour animation of rigid bodies.
Particles: Result files for particle animation(*.rpa, *.rwa, *.bin).
Min. Time: Set the minimum time to extract. If the user turns off the check option, it does not work.
Man. Time: Set the maximum time to extract. If the user turns off the check option, it does not work.
Extracted Output Folder: Set the location to create the extracted result files.
Extracted File Name: Set the name to be created.
Show Message: Select whether to show message dialog.
Run: Run the extract. Files that have been extracted are displayed in green, and files that have been failed are displayed in red.
To extract result files as batch file
The user can extract animation and plot results using batch file.[RegenerateResultFiles.exe] /extract [output folder] [file name] [extracted output folder] [extracted file name] [min time] [max time]Example)“<Install Dir>\Bin\Utility\RegenerateResultFiles.exe” /extract “C:\Model1_01” Model1 “C:\Extracted” ExtractedResult 3 10
User Defined Output
The user remove unnecessary rplt data and makes it a csv, rplt file.
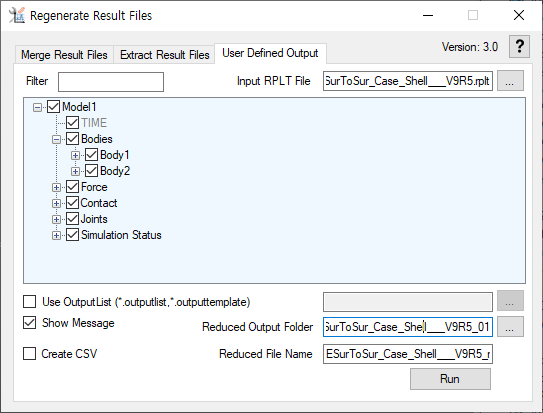
Figure 2.42 User Defined Output tab in Regenerate Result Files dialog
Filter: Search for element, entity names shown in tree view.
Import rplt file : Set the origin rplt file path.
Use OutputList: Use user-created text without using tree view.
*. outputlist: Use the path of the element and generates only the selected element values as a result.
ex) Joints/RevJoint1/Acc1_Relative
*. outputtemplate: Use to import duplicate element values without using the name of Entity.
ex) Bodies/Pos_TZ, Pos_TX, Pos_THETA
Reduced Output Folder: Set the location to create the reduced result files(*.csv, *.rplt, *.outputlist).
Reduced File Name: Set the name to be created.
Create CSV: Make rplt data into csv files.
Show Message: Select whether to show message dialog.
Run: Run the reduce file.
To extract result files as batch file
The user can extract animation and plot results using batch file.[RegenerateResultFiles.exe] /Reduce [Input RPLT path] [Input Outputlist path] [extracted output folder] [extracted file name]Example)“<Install Dir>\Bin\Utility\RegenerateResultFiles.exe” /Reduce “C:\Model1_01\model.rplt” Model1 “C:\reduce” model_reduce.rplt
RDSettingTool.exe
The user can solve some installation problems. More detailed instructions are available in the install guide.
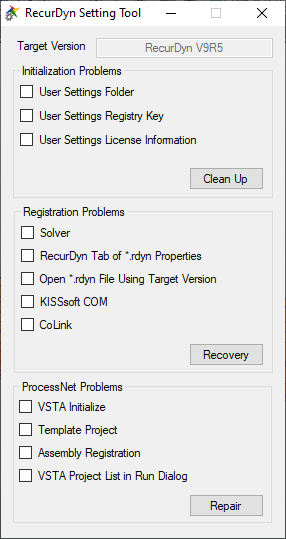
Figure 2.43 RecurDyn Setting Tool dialog
RDVersionChecker.exe
The user can check *.rdyn file version information.
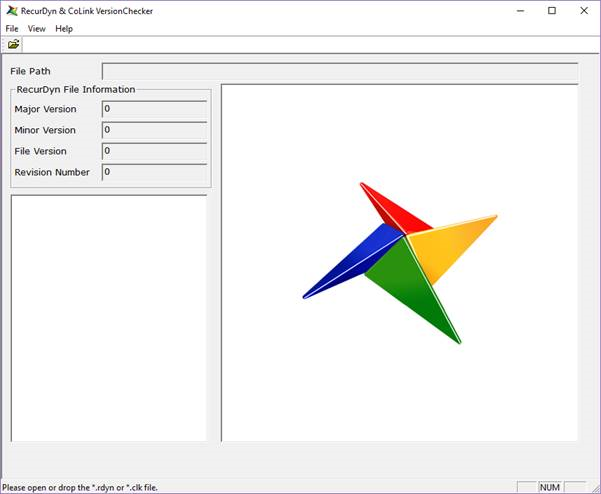
Figure 2.44 RecurDyn & CoLink VersionChecker dialog
TktCfg.exe
The user can set which toolkits to load and which toolkits to read license.
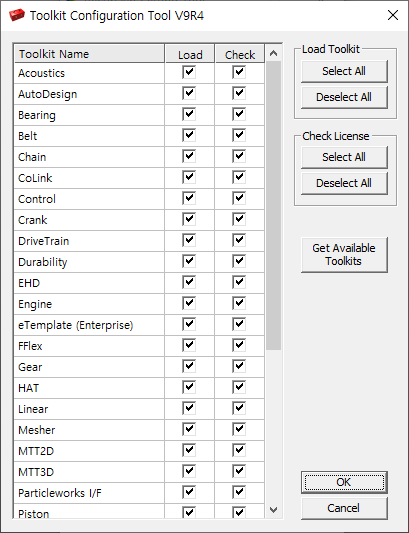
Figure 2.45 Toolkit Configuration Tool dialog